Setting up APNS for iOS
Last week we started setting up push notifications on the iOS app we are building at work. I knew from my time at QuizUp that this is more complicated than you’d think, but still I was surprised at the complexity Apple front-loads on people developing for their platforms.
I read a couple of guides which were either slightly too vague, or really detailed but contained directions for outdated versions of one of the many graphical user interfaces Apple seems to think developers enjoy (hint: most of us do not!).
First I attempted what I usually do: to understand what I am doing before committing to any potentially confusing changes. After spending some time with this layercake of cryptographic overengineering I abandoned hope of abstract understanding and decided to learn by doing.
Thirty hours later I was left with a whole bunch of useless keys, certificates, provisioning profiles, app ID’s and various unspeakable things done to my local keychain and our iOS “Certificates, Identifiers & Profiles” in the Apple Developer Center. But I ended up with these steps here.
I was helped a lot by this excellent guide
by Ray Wenderlich. I pretty much followed his steps, but use the openssl
command line tool instead of Apple’s “Certificate Assistant”.
So without further ado, here are the steps I followed:
In your terminal of choice, Generate private key
openssl genrsa -out com.example.app.key 2048
In that same terminal, create a CSR (Certificate Signing Request)
I recommend keeping these two files somewhere safe, you’ll need them in step 5.$ openssl req -new \ -key com.example.app.key \ -out com.example.app.csr \ -subj "/[email protected]/CN=com.example.app/C=IS/O=Example Ltd"
Log into the Apple Developer console. Go to “Certificates, Identifiers & Profiles”, and create a new App ID, I’ll use
com.example.appfor this guide.Again in the Apple Developer console, Click “Edit” under “Application Services”, and scroll down to “Push Notifications”, click there “Create Certificate”. Use the CSR created earlier (
com.example.app.csr) to create the certificate, download it, it will have a filename likeaps_development.cer.Convert the .cer file into a PEM file:
openssl x509 -in aps_development.cer -inform der -out com.example.app.aps_developement.pem
Test your key and certificate against APNS:
If everything is OK, you should see a “CONNECTED..” string, followed by a succesful SSL handshake. You can stop by sending EOF (^D).$ openssl s_client -connect gateway.sandbox.push.apple.com:2195 -cert com.example.app.aps_developement.pem -key com.example.app.keyCombine the private key and the aps_development certificate into a single PEM file:
You will use this file later when sending notifications.$ cat com.example.app.key com.example.app.aps_developement.pem >> apns_com.example.app_combined.pemGo into the Apple Developer Console, open “Provisioning Profiles” click the “+” icon. There choose “iOS Development”, then click continue. There choose the App ID created earlier (com.example.app) and click continue. Then choose the developer certificates and the devices, finally click “generate”. Choose a name for the profile and then download it.
Once you’ve downloaded your profile (should have a .mobileprovision suffix) drag it into XCode, or open it in XCode somehow.
Now what you do with the provisioning profile is something I’ll leave to my colleague Trausti to explain, since he wrote the client code. Until then you can check out Ray’s guide I mentioned here above, and figure out how to get your very own device token.
Once you’ve gotten your device token for your app using the same bundle
identifier as you used in my steps above (com.example.app) you’ll want to
test it. Since I’m mostly using python these days, and Ray’s example was in
PHP (which works fine btw!), I decided to implement an APNS test script
in python: apnsend.
$ git clone [email protected]:steinnes/apnsend.git
$ cd apnsend
$ make
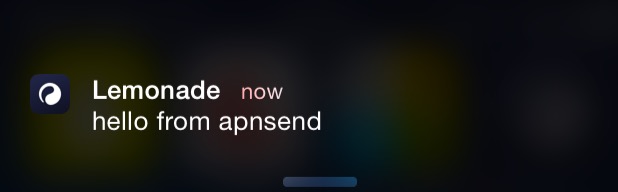
$ venv/bin/apnsend apns_com.example.app_combined.pem token "hello from apnsend" -s
The script takes as a parameter the PEM file containing your key and the certificate generated by apple, and a device token requested from an app with the bundle id, which was built using the provisioning profile.
The end result should look something like this:
First push notification